
One of the best and easiest ways to personalize areas of your classroom is through your bulletin boards. You can purchase your own letters at teacher stores, dollar stores, and even Target or Walmart around the beginning of the school year. However, this can get pricey and sometimes there are not a lot of options offered. Creating your own letters in Google slides will not only save you money, but it also allows you to personalize a space with colors, fonts, sizes, etc. Follow along with these steps to create your own!

Step 1: Open up a new Google slides presentation. Delete everything on the page so it is entirely blank. Then, change the size of the page to 8.5×11. We want to do this so our presentation mocks the size of a traditional piece of printer paper. To do this, click on ‘file‘ at the top left, ‘page set-up‘, ‘custom‘, and then type in ‘8.5×11′.
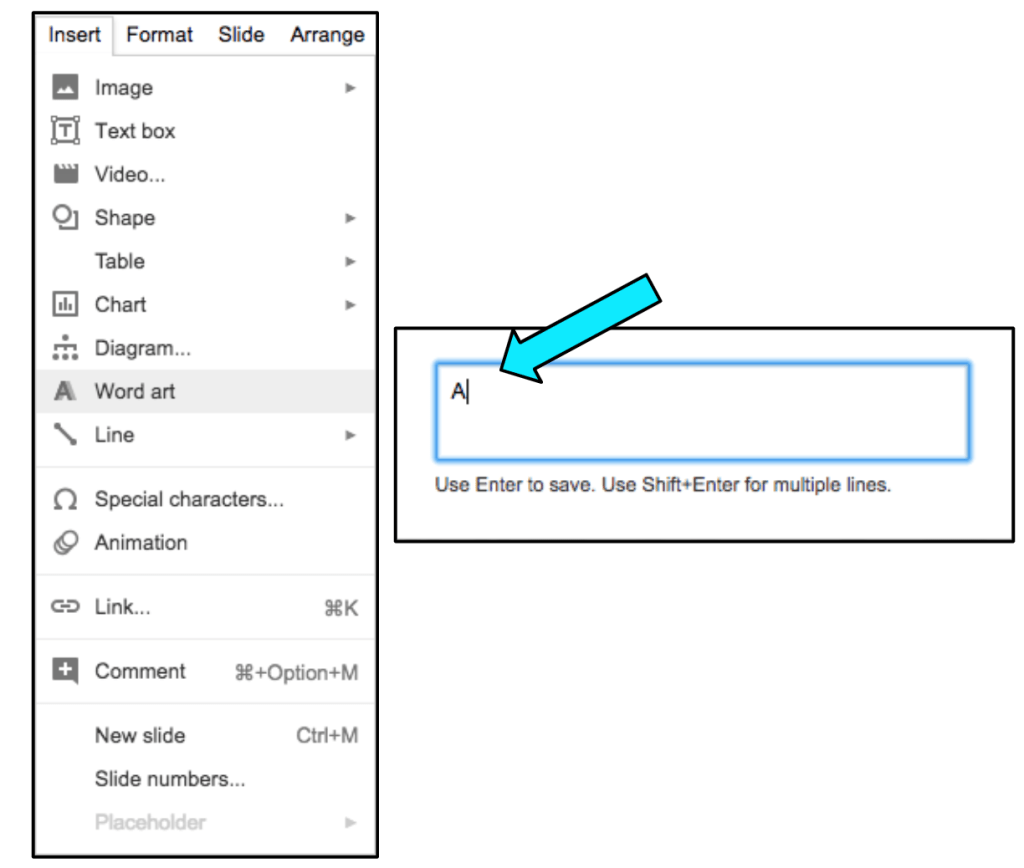
Step 2: Now that your page is set-up, you want to insert a ‘Word Art’. To do this, click on ‘insert’ in the toolbar, and then ‘word art’. Type in a SINGLE LETTER and then click ‘enter’ to save it. It’s easier to create letters one-by-one because of spacing in Google.
A
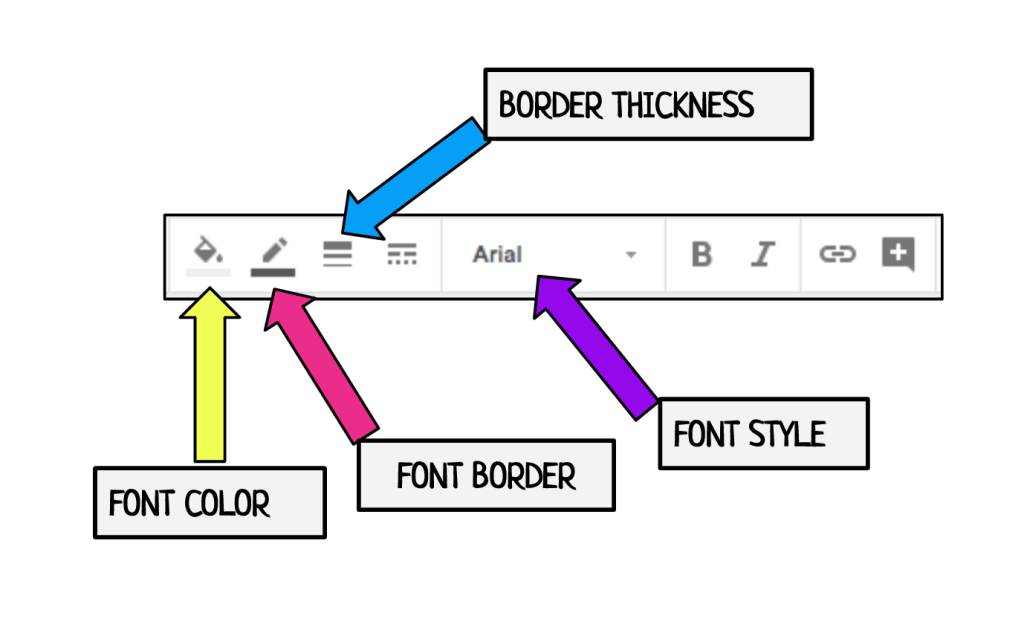
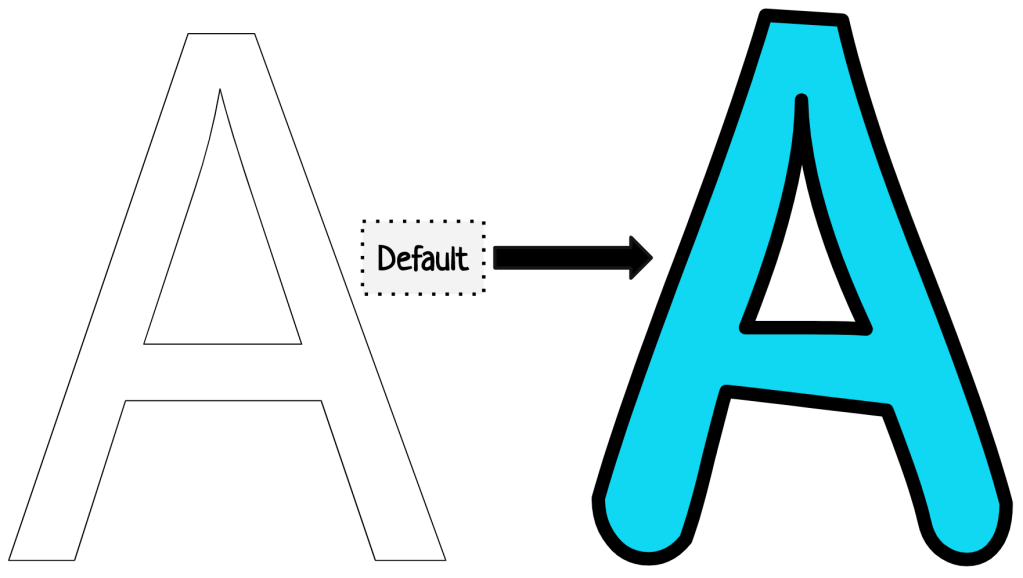
Step 3: Once you have your letter ready-to-go, it’s time to customize it. We want to customize the font style, the the size of the letter, the border thickness, and the color. All of these options are located in the top tool-bar. *this step may take some time, but you want to make sure that it’s exactly how you want it to look since we will be copying + pasting this letter to complete the set!
Your letters should transform similarly to this!

Step 4 (optional): If you’re having trouble finding fonts that like in your drive, you can add more than just the standard default fonts. To do this, click on ‘add fonts’ at the top and search through more to add. There are A LOT of fonts, and when you think you’ve scrolled through all of them, more will load.

Step 5 (optional): Take some time to add more or use my cheat-cheat for ‘fonts you need to add to your drive‘. I have found these fonts to be the best for larger bulletin board letters for my classroom. I always use these and my personal favorite is ‘neucha’ and ‘englebert’. As you’re adding fonts to your drive, you will see that some fonts look very different when they are blown up as a Word Art but these are always great options to use.

Step 6: Once your letter is ready-to-go, you can copy & paste it so your slide is filled (I usually put 2 letters per slide, but sometimes for larger letters, they will take up the entire slide). Once your slide is completely filled, you want to ‘duplicate’ the slide. This will keep all of the sizing, colors, and format the same for each letter. Continue this step until everything your letters are all created and ready.
A
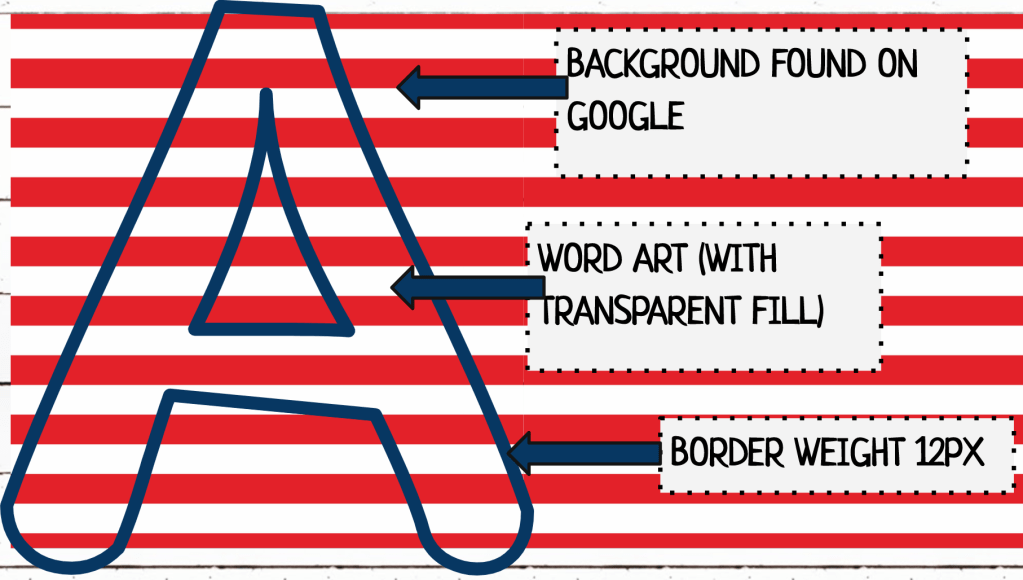
Step 7: If you want to print letters with a pattern or background, you can do this by searching and finding the pattern on Google, and then completing the same steps as above over the background. For example, if you want to create red and white striped letters, search for ‘red and white stripes’ in Google. Find a picture, copy + paste it into your slides, and then fill out the Word Art over the picture. Make sure that the color inside your Word Art is ‘transparent’.
Other Tips
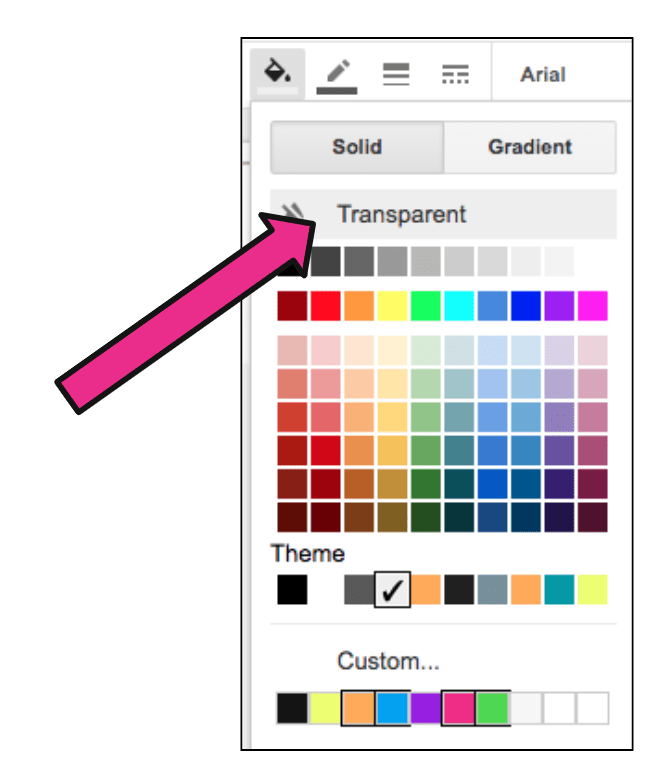
Tip 1: If you want to print on colored paper, make sure that the text fill is ‘transparent’. When you print, your letters will be the same color as the paper. You can also create your own colors by clicking ‘custom’ at the bottom. There are so many different color options to pick from other than the default colors provided.
A

Tip 2: If you are printing on colored paper, you might have to rearrange the letters if you want the colors to alternate. For example, these slides are going to spell out ‘have a great day.‘ I wanted the colors to alternate on the board, so I rearranged the letters so they printed in the same way.
KA
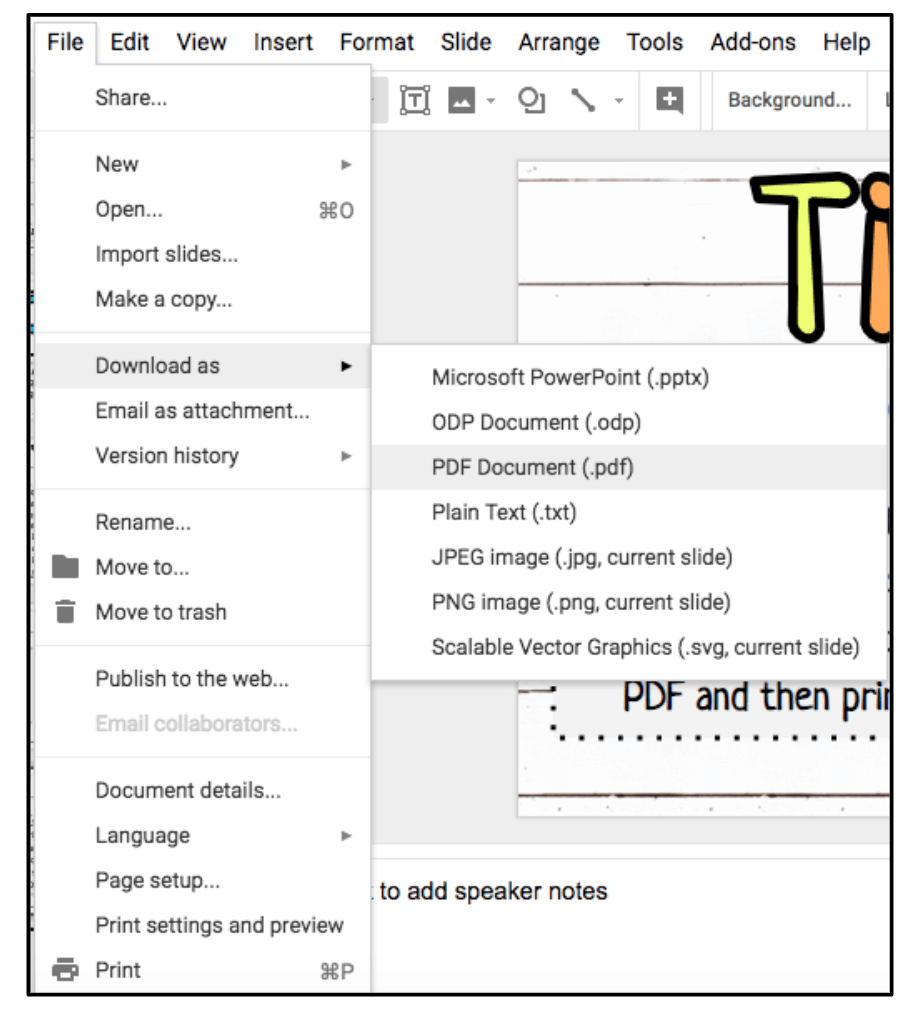
Tip 3: Always look at the print preview before printing your letters! Sometimes, depending on the printer, letters or images can be cut off. If this happens in the ‘print preview,’ download the slideshow as a PDF and print from there. You can do this by clicking ‘file,’ ‘download,’ and then ‘PDF.’
A
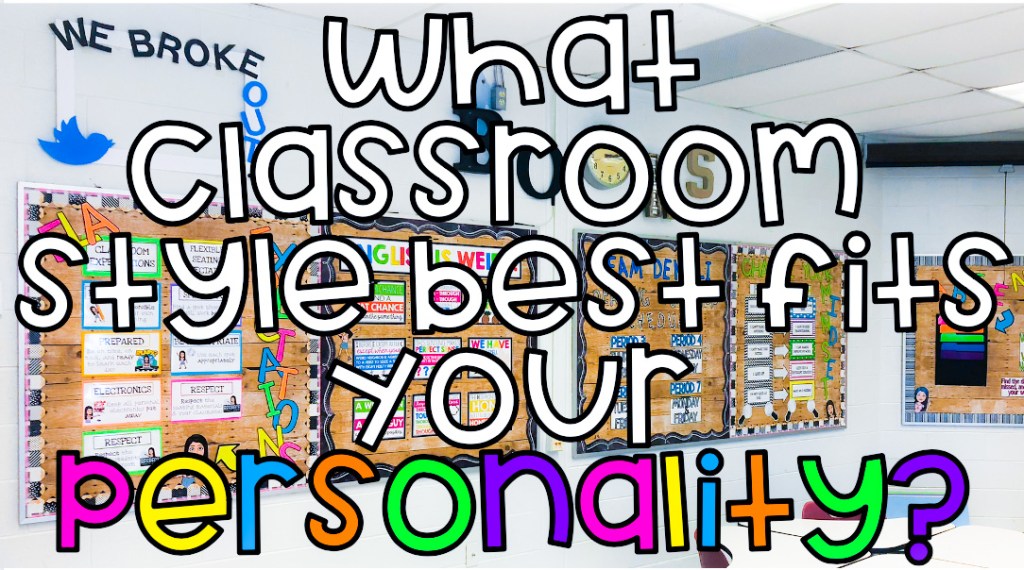
Tip 4: Think about your classroom style and how you want it to look and feel. If you’re having trouble on where to start, take my Buzzfeed Quiz to help! Having a consistent style, color scheme, or theme will help when you’re creating your own materials!
A
Enjoy! I hope that these tips have helped! It may feel like a lot of work right when you start, but it will get easier the more time you spend time creating and personalizing.
